Branch Transfer Receive
Where Branch Transfer Send creates an order to transfer assets from one internal location to another, Branch Transfer Receive registers the transferred assets when that order is delivered.
NOTE
These instructions are for the base version of TrackAbout Mobile 7. Because TrackAbout Mobile 7 is highly customizable, the screens and prompts you see may differ from those shown here.
To use Branch Transfer Receive:
-
Start Branch Transfer Receive.
-
Select a branch transfer order.
-
Register the delivered assets.
-
Accept the order.
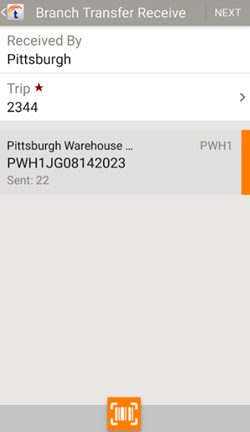
Tap Branch Transfer Receive to begin.
Select a Branch Transfer Order
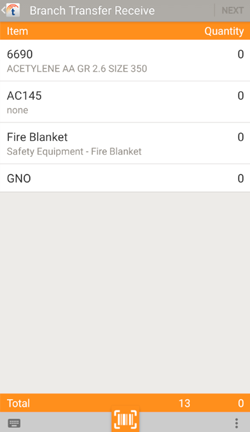
Item — The item(s) being transferred, by product code. Tap an item to manually change quantities: Scanned, Not-Scanned, or Hardgood.
TIP
Receiving Assets in Pallets / Containers — Scanning a pallet (aka container) adds the pallet and all the assets to the transfer.
Quantity — The number of the item confirmed to be in the transfer.
Receive tracked items by scanning them or manually entering their tracking code. Receive not-scanned items or hardgoods by manually adjusting their quantities.
TIP
If you’re using Automatic Receiving and you’re receiving to a trusted location, the items in the transfer are automatically marked as received.
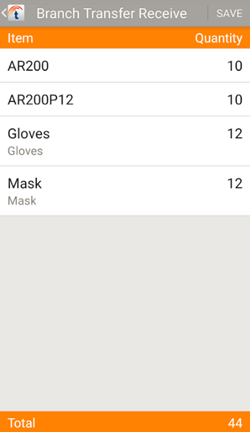
With Automatic Receiving, you cannot manually change, add, or remove items. To complete the transfer receive, tap SAVE.
 — Tap to manually enter a tracking tag.
 — Tap to scan with your device's camera.
 — Additional options:
Finish Later — Save your progress so you can return later without having to start over.
Add Line Item — Add a non-scanned asset to the transfer.
View Details — Display details on the items in the transfer order.
Tap NEXT to continue.
NOTE
The quantities received must equal the quantities sent (indicated in green) before you can continue.
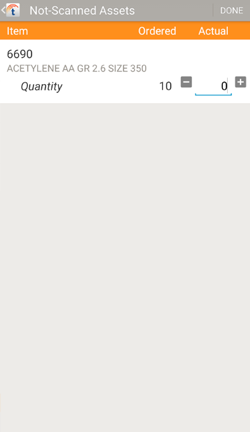
Manually note the number of not-scanned assets received.
![]() — Add one to the quantity.
— Add one to the quantity.
![]() — Subtract one from the quantity (minimum 0)
— Subtract one from the quantity (minimum 0)
DONE — Save and return to Asset Review.
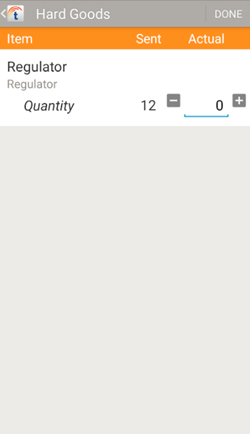
Manually note the number of hardgoods received.
![]() — Add one to the quantity.
— Add one to the quantity.
![]() — Subtract one from the quantity (minimum 0)
— Subtract one from the quantity (minimum 0)
DONE — Save and return to Asset Review.
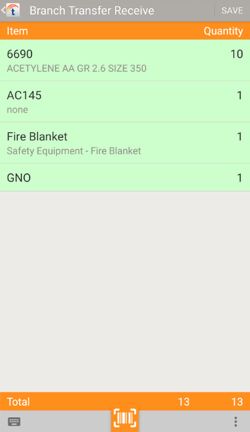
Once you’ve scanned or entered all the assets being received and it matches with the quantities that were sent, tap SAVE to confirm the transfer.
TIP
Not finished adding items to the container yet? Use the Finish Later option instead of Save.
 to
to 