Branch Transfer Send
Branch Transfer Send begins the transfer of assets from one internal location to another. Use Branch Transfer Receive to register the transferred assets when the transfer is delivered.
NOTE
These instructions are for the base version of TrackAbout Mobile 7. Because TrackAbout Mobile 7 is highly customizable, the screens and prompts you see may differ from those shown here.
To use Branch Transfer Send:
Tap Branch Transfer Send to begin.
Select a Branch Transfer Order
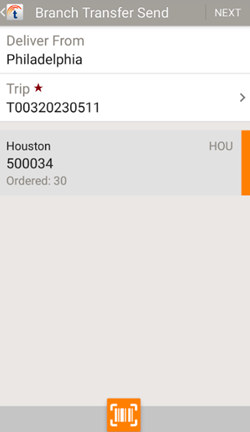
Add the Assets Being Transferred
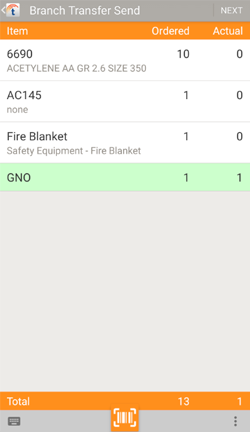
The items in the selected order are displayed next, by product code, along with the total number of items Ordered. When Actual equals Ordered, the item is highlighted in green. Items highlighted in yellow are assets not in the original transfer order.
Item — The product code of the item. These can be tracked (scanned), untracked (not-scanned), or hardgoods.
TIP
Hardgoods have a description under the item name.

Ordered — The quantity of the product ordered.
Actual — The quantity of the product being transferred.
Tap a scanned or non-scanned item to add not-scanned assets to the Actual total. Tap a hardgood to add hardgoods.
Tap NEXT to continue.
NOTE
Actual should equal Ordered for each line item (indicated in green) before you can confirm the transfer order is ready.
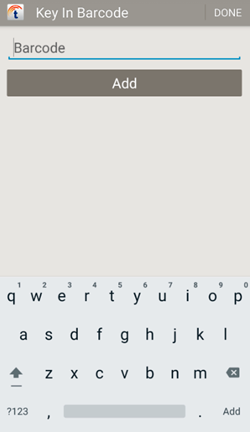
Enter an asset's valid tracking code in the Barcode field and tap Add to add the asset to the transfer.
Tap DONE when finished adding assets by tracking code.
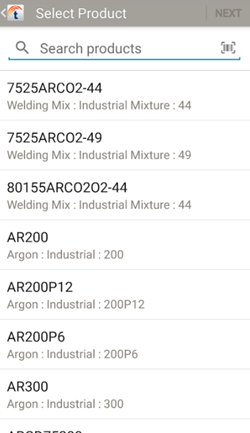
Select a product code to add to the order.
Search Products — Search for a product code.
 — Search for a product code.
 — Scan a product code.
Tap a product code to select it, then tap NEXT to set the number of items with the selected product code to add to the transfer.
NOTE
Items are added as non-scanned.

Adjust the number of the product to include in the transfer.
Actual — Tap ![]() to add and tap
to add and tap ![]() to subtract as needed.
to subtract as needed.
NEXT — Tap to finish editing the quantity.
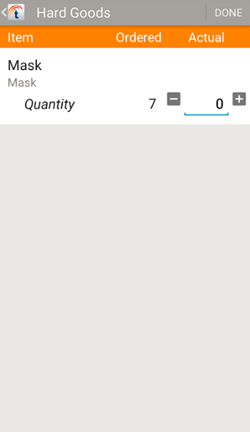
Adjust the number of the product to include in the transfer.
Actual — Tap ![]() to add and tap
to add and tap ![]() to subtract as needed.
to subtract as needed.
NEXT — Tap to finish editing the quantity.
TIP
If lot numbers are required, you will be prompted to enter a lot number and before continuing.
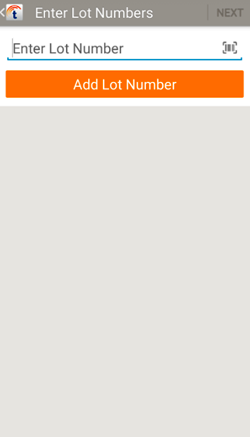
Enter a lot number and tap ADD LOT NUMBER. You may add one or more lot numbers.
Tap NEXT to be prompted to specify how many assets are in each entered lot.
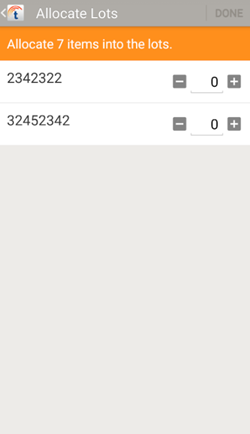
Adjust the quantities as necessary and tap DONE when finished.
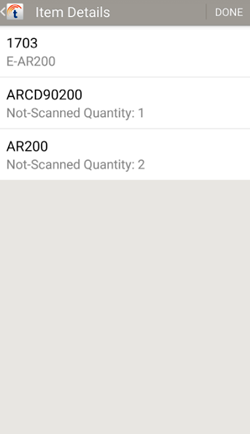
This screen lists the products that have been added to the transfer so far. If any of the items of a particular product code are non-scanned items, it is noted under the product code.
Tap a product and tap  to remove it from the transfer.
Tap DONE when finished.
 to
to  — Manually
  —
—  — Additional options: