Return Assets
Return Assets is a delivery that only allows returns.
NOTE
These instructions are for the base version of TrackAbout Mobile 7. Because TrackAbout Mobile 7 is highly customizable, the screens and prompts you see may differ from those shown here.
To use Return Assets:
Tap Return Assets to begin.
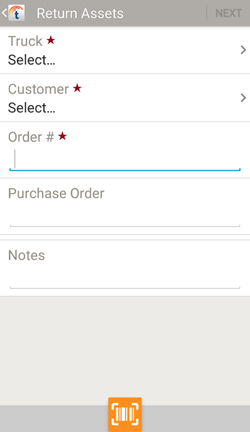
Select the truck, customer, and order number for the return.
Truck — Tap to select the truck being used.
Customer — Tap to select the customer.
Order # — Tap to key-in the order number.
Purchase Order — Tap to key-in a purchase order, if any.
Notes — Tap to key-in any notes.
Tap NEXT to continue.
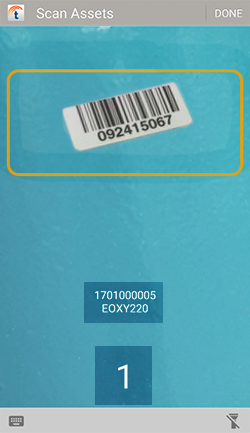
 — Manually key in a tracking tag.
  — Turn your device's flashlight on or off.
Scan in items as needed using your device's camera, or a handheld barcode or RFID scanner.
Continue to Review when done scanning.
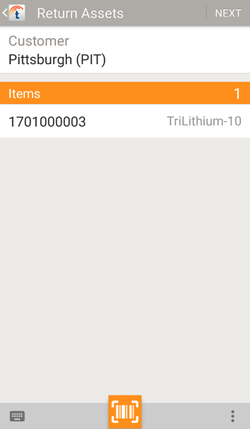
Review the items being returned and add additional items if needed.
 — Scan additional items using your device's camera.
 — Additional options.
Add Product — Add items by product code.
Tap NEXT when you're ready to complete the order.
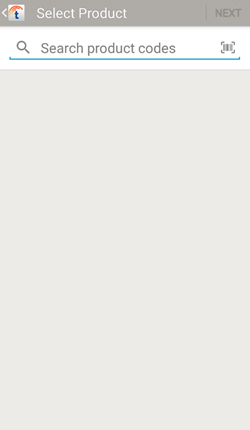
 — Search product codes.
 —
—
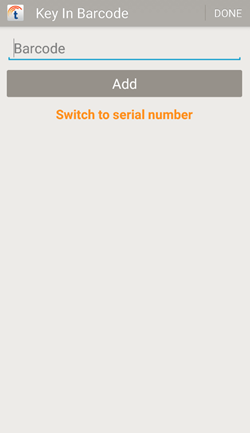
Add assets by keying in their tracking code or serial number.
Tap Barcode and key in a tracking code. To enter a serial number, tap Switch to Serial Number.
Tap Serial Number and key in a serial number. To enter a barcode, tap Switch Back to Barcode.
Tap DONE when you've finished keying in assets to return to the Review screen.
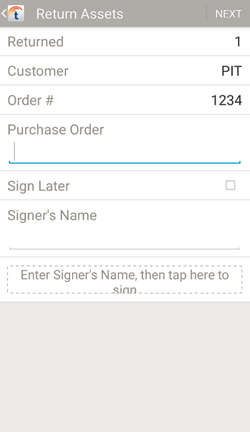
Collect a signature from the customer.
Purchase Order — Purchase order number, if any.
Sign Later — Check this to collect the signature later, using Collect Multiple Signatures.
Signer's Name — Key in the name of the person signing off on the return, then have them sign using a stylus or finger.
Tap NEXT to continue.
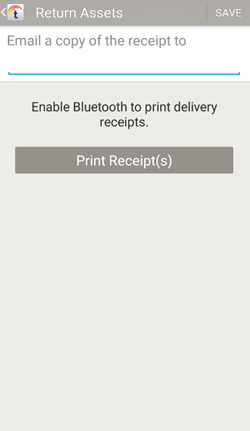
Email and/or print a copy of the receipt for the customer.
Email a copy of the receipt to — Enter one or more email addresses to send the receipt to. Separate multiple addresses with a comma.
Print Receipt(s) — Tap to print the receipt.
NOTE
Printing requires that your device is connected to a printer via Bluetooth.
Tap SAVE when done.
