Batch Delivery With Integrated Order Sync
Batch Delivery With Integrated Order Sync lets you quickly record large numbers of tracked assets during a delivery or return as quickly as you can scan a list of asset barcodes/tracking IDs.
TIP
Requires the Deliver with Integrated Order Sync (formally called Proof of Delivery) module.
Use this when
-
An order calls for 100 or more tracked assets, all with the same Product Code, to be either delivered or returned
-
You don’t need TrackAbout to check whether the barcodes you scan or enter are for assets of the correct Product Code, or even exist in TrackAbout
Do not use this when
-
Any validation of assets is required
-
You need to manually create an order
-
The order includes hardgoods, services, charge items, or bulk tanks
-
Line items in the order include both ships and returns
To use Batch Deliver with Integrated Order Sync:
NOTE
These instructions are for the base version of TrackAbout Mobile 7. Because TrackAbout Mobile 7 is highly customizable, the screens and prompts you see may differ from those shown here.
Tap Batch Delivery to start.

The orders in the selected trip are displayed here.
Tap to select the order you are currently delivering.
Deliver From — The order's delivery location. To change your Deliver From location, see the Menu.
Trip — The trip number. Tap to select from all available trips on the truck.
 — Scan an order number (using your device's camera).
If your system has been configured to read lot numbers on an asset’s tracking barcode label, TrackAbout uses the lot number from the label to automatically fill in the asset’s lot number. For manually entered orders, you’re prompted to select a lot number from another line item in the order, or confirm the lot number is not listed.
 — Tap to display additional options, if any.
Tap NEXT to continue.

Displays the items in the order by product code, how many were Ordered, how many have shipped, and how many are being delivered (Actual). Also displays the items being returned and how many were expected.
Item — The items in the order, by Product Code.
Ordered — The number of the item ordered.
Actual — The number of the item shipped or delivered.
 — Manually key in a tracking tag to add it to Actual.
— Use Continuous Scan to record lists of tracking barcodes using your device's camera.
— Tap to display additional options, if any.
Delivery photo — Attach pictures to the delivery record.
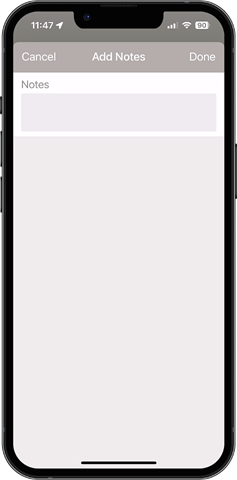
Add notes — Add notes to the delivery.
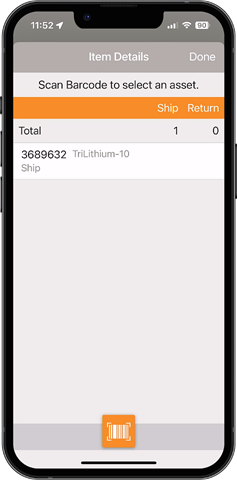
View details — View details about the assets added to the delivery.
Tap NEXT to continue.
NOTE
If any line item's Actual quantity does not equal its Ordered quantity, you may be prompted to enter reasons for the discrepancy before reaching this step.
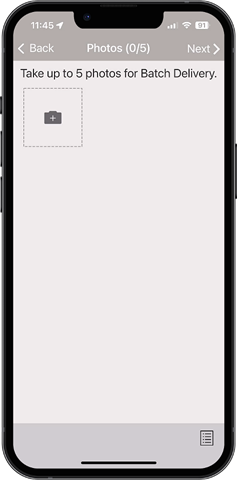
Attach pictures to the delivery record, along with a date, timestamp, and GPS coordinates. Photos can be used as visual proof a delivery was made, or why it couldn’t be.
Tap  to add a new photo using your device's camera.
— Tap to display additional options.
Pick Existing Photo Choose an image from your device.
Tap DONE to continue.
 — Remove the selected item from the delivery record.
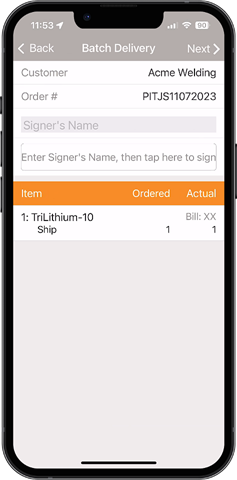
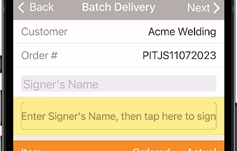
Review the delivery and get a customer signature.
Customer — The customer name.
Order # — The order number.
Sign Later — Check to collect a signature later using Collect Multiple Signatures.
Signer's Name — Tap to enter the name of the person signing for the selected deliveries.
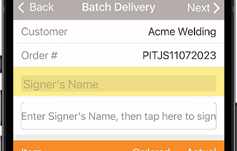
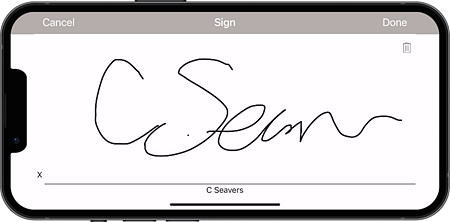
Tap here to sign — Tap to open Sign-Off.
Item List
Item — The items in the order, by Product Code.
Ordered — The quantity of the item ordered.
Actual — The number of the item shipped/delivered.
Tap NEXT to continue.
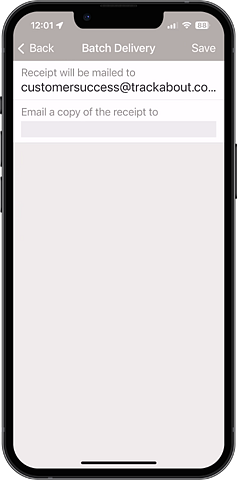
Email a copy of the receipt to — Enter one or more email addresses, separated by commas, to email the delivery receipt to when you tap SAVE.
Print Receipt(s) — Tap to print a copy of the receipt to the selected Current Printer.
NOTE
This option is only available with a printer connected and setup.
Tap SAVE to finish.
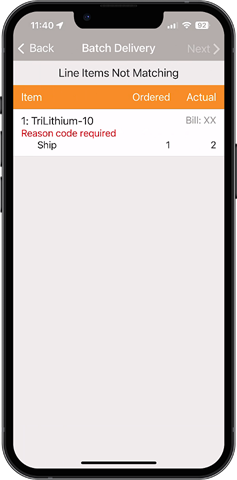
When a line item's Ordered and Actual numbers don't match, you may be prompted to select a reason for each mismatch. If that happens, tap an item to be prompted to select the reason for the mismatch.
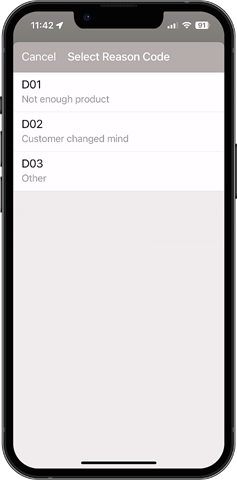
Once all mismatches have been explained, tap NEXT to continue.
